


Wall Mural installation in TNT
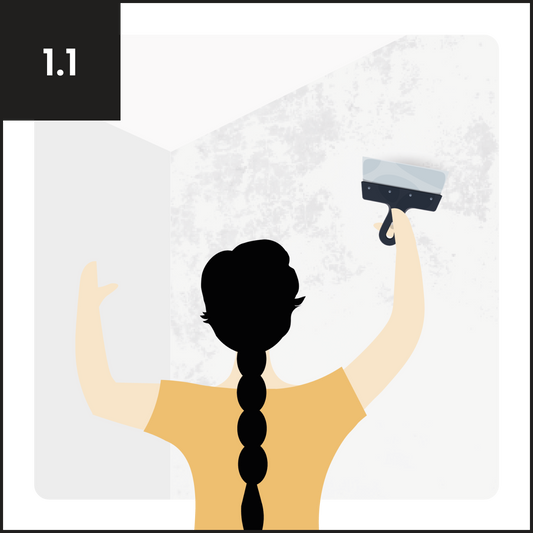
Remove the old coating easily and quickly with a stripping product and a spatula: prepare the surface perfectly
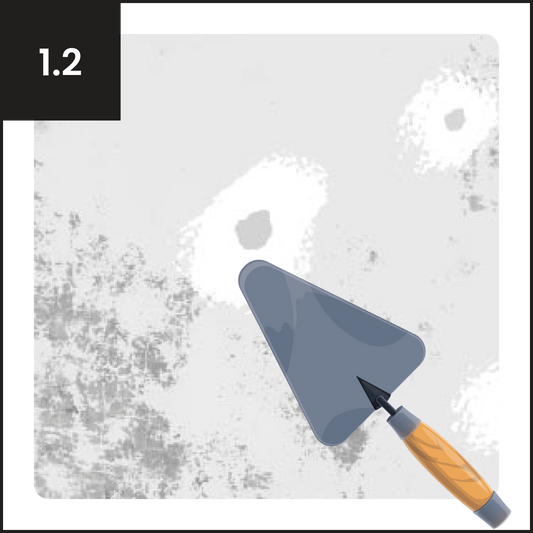
Make sure the wall is completely clean and dry, fill the holes and sand any imperfections until the surface is smooth and even
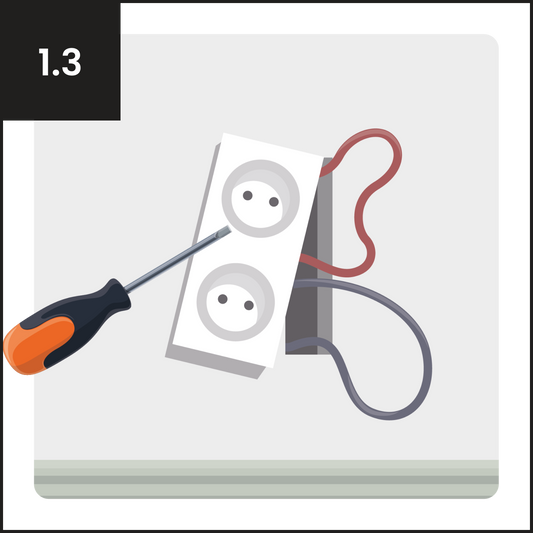
Using a screwdriver, remove all the switch and electrical outlet plates
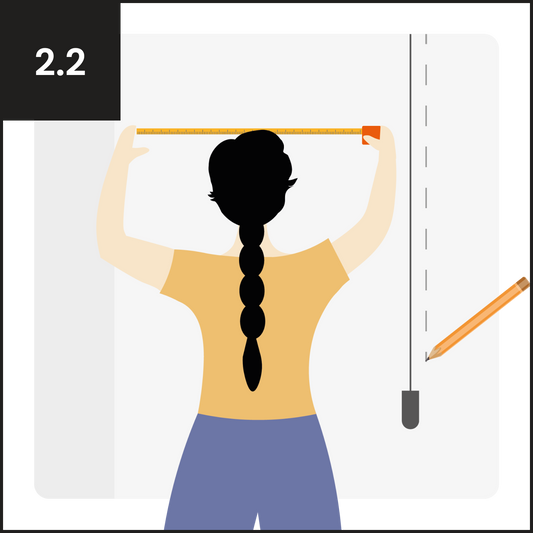
Take measurements
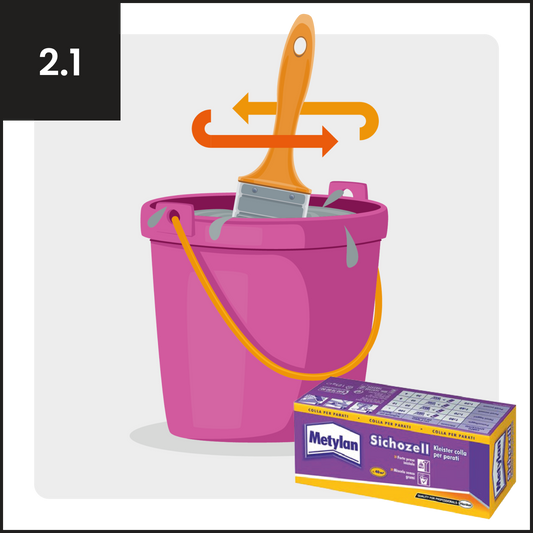
Prepare the glue for Wall Mural by mixing it evenly and carefully following the proportions indicated on the package
Use the plumb line and mark reference points on the wall; this will allow you to adjust the positioning of the sheet during installation.
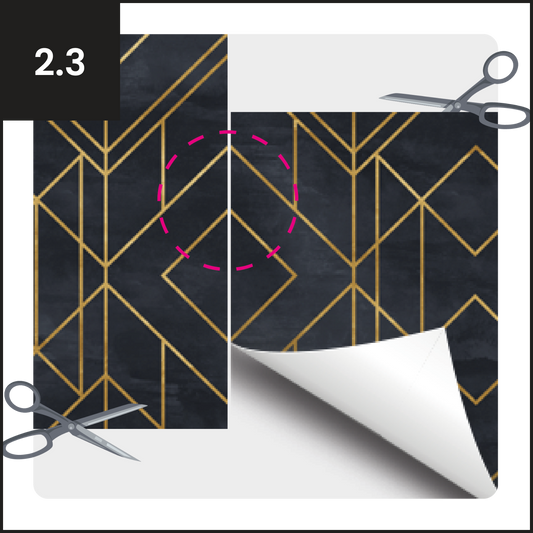
Make sure the graphics align and then trim any excess if necessary. To avoid misalignments, we recommend cutting the sheets during the installation process.
Prepare the installation
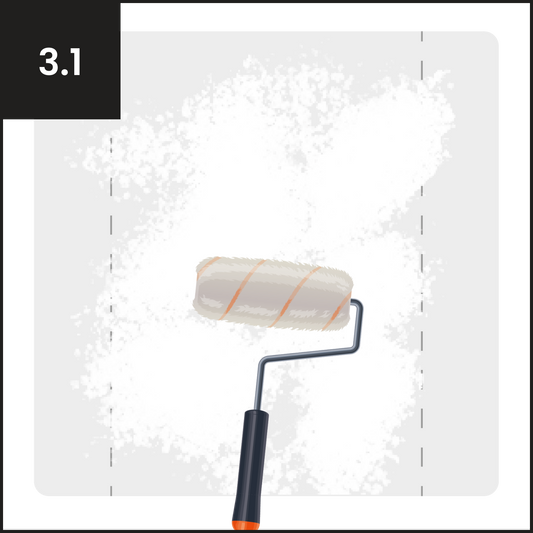
Spread the glue directly on the wall using a roller or a brush, covering the entire width of the roll by using the lines drawn during preparation as a reference.
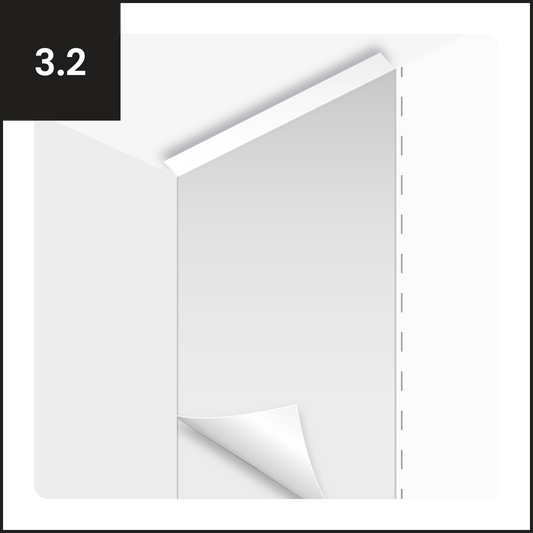
Place the first sheet on the wall starting from the top and leave an excess of 5 cm. Check that the sheet matches the reference lines drawn previously.

Using a rigid spatula, press the entire sheet against the wall. With even movements, start from the center and push the excess glue towards the edges.
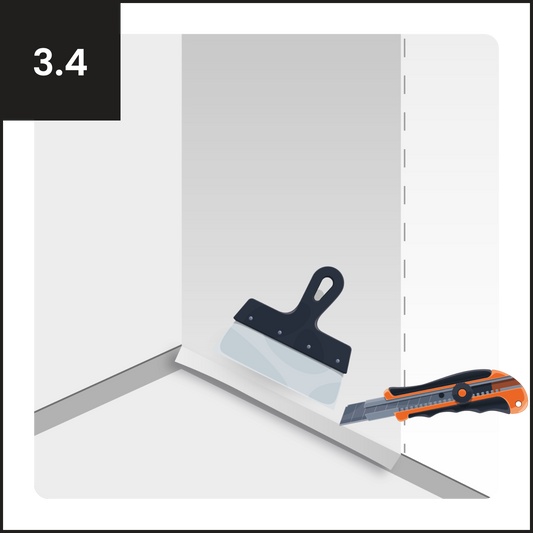
With a spatula and a cutter, trim the excess flush with the baseboard and with the ceiling at the top part
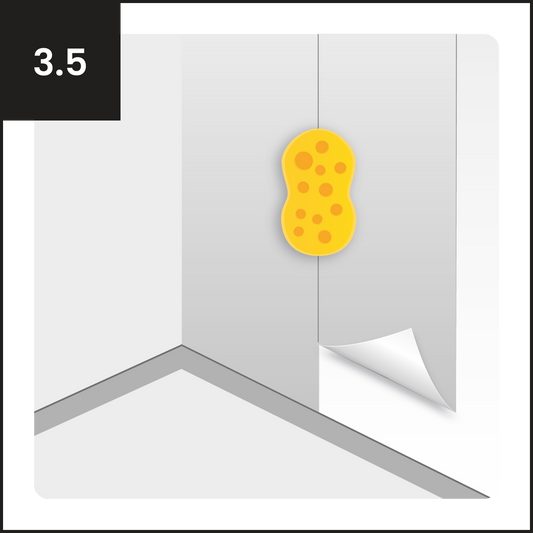
Lay the second sheet next to the first one, paying attention to the alignment before pressing it against the wall. Smooth the joint area carefully using a damp sponge to remove any excess glue.
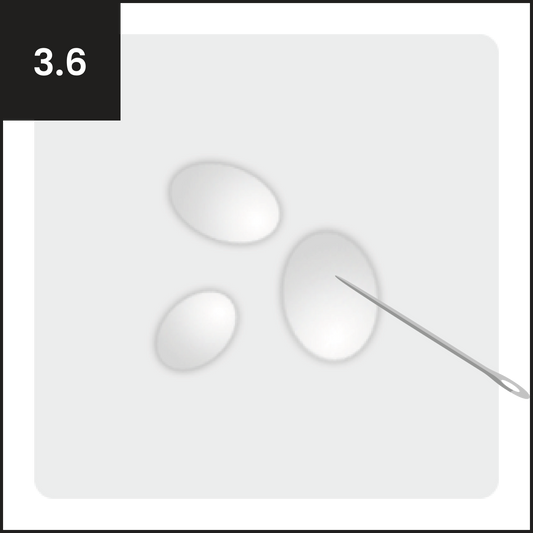
After installation, some air bubbles may appear, which should deflate on their own. If they persist, you can pierce them with a pin and inject glue inside the bubble using a syringe.
Installation of Wall Mural in TNT
Applying TNT wallpaper is a simple process, made even easier by the characteristics of this material. By carefully following these steps, you will achieve a flawless and long-lasting result.
Step 1: Wall Preparation – The Perfect Base
This is the most critical phase, especially in environments subject to humidity. The goal is to create a surface as smooth, uniform, and sanitized as possible to prevent mold formation.
- Assessment and Thorough Cleaning: Remove any traces of mold, fungi, or dirt from the wall. If present, clean thoroughly with specific anti-mold products.
-
Skimming and Filling (If Necessary): If the wall is damaged, flaking, or if it is a previously tiled wall, you will need to intervene to make it smooth. Remove any residues of old glue or wallpaper.
- For uneven walls, proceed with a skim coat to even out the surface.
- In the case of tiles, fill the joints and the entire area to create a continuous and level surface. The goal is to achieve a wall as white and smooth as possible.
Step 2: Glue Preparation
- Glue Preparation: Use high-quality wallpaper glue, carefully following the instructions for proportions and mixing times.
- Alignment Mark for Strips: Use a plumb line and mark reference points on the wall; this will allow you to adjust the sheet placement so it is perfectly perpendicular to the floor during installation.
Step 3: Wallpaper Installation
- Glue Application: Apply the glue evenly on the back of the first Wall Mural sheet and directly on the wall.
- Sheet Application: Position the first sheet starting from the top, aligning it precisely. Use a spatula or a special roller to remove any air bubbles, working from the center towards the edges.
- Alignment: Apply the next sheets, ensuring the patterns align perfectly and the edges are closely butted without overlaps or gaps.
- Finishing: Once all the sheets are positioned, cut the excess wallpaper along the ceiling, baseboard, and corners with a cutter, using a ruler for precise cuts. If bubbles are present, lightly puncture the surface to completely release the air and press the raised areas to fully adhere the wallpaper to the substrate.
Step 4: Application of Crystallizing Primer
An additional protective layer to make the Wall Mural water-repellent and washable with mild detergents. A barrier against dirt and dust applicable with a soft roller, either pure or diluted
Installation of Fiberglass in Environments in Contact with Water
Installing Wall Mural in humid environments requires a few but precise steps:
- Prepare the Wall: Make the wall smooth, clean, and even, removing mold or imperfections.
- Apply Primer: Spread the anti-condensation primer to create a thermal barrier and improve adhesion.
- Prepare and Cut: Mix the specific glue, cut the Wall Mural sheets, and draw guidelines on the wall to apply the sheets perpendicularly.
- Lay the Sheets: Apply the glue and position the sheets, removing bubbles and aligning the patterns.
- Apply the Two-Component Resin: If you use fiberglass Wall Mural, spread the two-component resin over the entire surface, taking care of the joints, for extra protection against water, scratches, and mold. Seal with VICEVERSA DIAMOND: Apply the VICEVERSA DIAMOND sealant along all the edges of the Wall Mural for final protection against moisture infiltration.

Installation of Wall Mural in Fiberglass
To install the Wall Mural in a humid environment and ensure a lasting and flawless result, it is essential to follow a meticulous process that includes specific preparation and protection steps. Here are the detailed phases:
Phase 1: Wall Preparation and Restoration (The Secret to a Perfect Base)
This is the most critical phase, especially in environments subject to humidity. The goal is to create a surface as smooth, uniform, and sanitized as possible to prevent mold formation.
- Thorough Assessment and Cleaning: Remove any traces of mold, fungi, or dirt from the wall. If present, clean carefully with specific anti-mold products.
-
Smoothing and Filling (If Necessary): If the wall is damaged, flaking, or if it is a previously tiled wall, you will need to intervene to make it smooth. Remove any residues of old adhesives or Wall Murals.
- For uneven walls, proceed with smoothing to even out the surface.
- In the case of tiles, fill the joints and the entire area to create a continuous surface free of unevenness. The goal is to achieve a wall as white and smooth as possible.
Phase 2: Application of the Anti-Condensation Primer (PRIMER TA)
Once the wall is prepared, clean, and smooth, it is time to apply PRIMER TA, the water-based acrylic primer with glass microspheres.- Function: PRIMER TA is designed to create a thermal barrier on the wall, helping to prevent condensation formation and consequently the reappearance of mold and fungi. It also improves glue adhesion and helps make the surface more uniform and white.
- Application: Apply an even layer of PRIMER TA (using a roller or brush) over the entire surface that will receive the Wall Mural.
- Drying: Allow the primer to dry completely according to the instructions before proceeding.
Phase 3: Preparation of the Adhesive
While the primer dries, you can start preparing the Wall Mural and the adhesive.- Adhesive Preparation: Use the specific high-quality adhesive for fiberglass Wall Mural, carefully following the instructions for proportions and mixing times.
- Marking for alignment of strips: Use a plumb line and mark reference points on the wall; this will allow you to adjust the positioning of the sheet so that it is perfectly perpendicular to the floor during installation.
Phase 4: Installation of the Wall Mural
Begin the actual installation after the primer has completely dried.- Adhesive Application: Apply the adhesive evenly on the back of the first Wall Mural sheet (or directly on the wall).
- Sheet Application: Position the first sheet starting from the top, aligning it precisely. Use a spatula or a special roller to remove any air bubbles, working from the center towards the edges.
- Alignment: Apply the subsequent sheets, ensuring that the patterns align perfectly and that the edges are closely butted without overlaps or gaps.
- Finishing: Once all sheets are positioned, cut the excess Wall Mural along the ceiling, baseboard, and corners with a cutter, using a ruler for precise cuts. If bubbles are present, lightly pierce the surface to allow the air to escape completely and press the raised areas to ensure the Wall Mural adheres fully to the substrate.
Phase 5: Application of the Two-Component Resin
This is the crucial step for durability in humid environments and sealing the fiberglass fibers present on the Wall Mural.- Mixing the Two-Component Resin: Follow the mixing ratio indicated on the product packaging. It is essential to respect the precise proportions to ensure proper polymerization and optimal resin performance. Make sure the mixture is homogeneous, as free as possible from air bubbles and streaks.
- Resin Application Tools: You can use a short-pile roller or a brush, depending on the surface and your preference. Apply over the entire Wall Mural and work in sections to coat every part.
- Sealing the joints: Pay particular attention to the joints between sheets, ensuring the resin penetrates well to create a protective barrier against frequent washing and humidity.
Phase 6: Perimeter Sealing with VICEVERSA DIAMOND (Final Protection)
This is the crucial step for durability in humid environments.- Function: VICEVERSA DIAMOND is a silane polymer-based sealant/adhesive, essential for creating a protective barrier on the edges of the Wall Mural. It prevents moisture and water from infiltrating under the mural, preventing detachment, lifting, and mold formation.
- Application: Once the Wall Mural has been installed and the adhesive has set (usually after a few hours, following the adhesive instructions), apply a thin bead of VICEVERSA DIAMOND along all the perimeter edges of the mural: top, bottom, and sides where the mural ends. You can use a spatula or a moistened finger to spread the sealant evenly and discreetly.
- Setting Time: The sealant has an immediate initial set, but the final cure is reached in 12-18 hours.
Accessories for installation

GLICOVIL DECOR - Wallpaper glue 250 gr
Universal powder adhesive for installing wallpaper with backings of all types.Glicovil Decor is used for gluing wallpaper with backings of all types to walls. Particularly recommended for the application of heavy vinyls with paper backing, non-woven fabric and printed T.N.T. ON all absorbent substrates...

Two-component resin for fiberglass
Enhance the beauty of your fiberglass wallpapers with our two-component protective resin, which provides a transparent satin finish. This product has been specially formulated to repel driving rain, ensuring complete protection. Its exceptional breathability allows the material to breathe, maintaining a healthy environment. Moreover,...

WHITE PRIMER TA - Acrylic Anti-Mold and Anti-Algae Primer 1 kg
The PRIMER TA is a fundamental step in preparing your walls, to be applied before the glue and the installation of the Wall Mural. Its application is crucial to ensure an ideal and lasting result, especially on surfaces with moisture issues or irregularities. Its...

VICEVERSA DIAMOND - Wallpaper Sealant 300 ml
VICEVERSA DIAMOND is the ideal sealant to protect your Wall Mural once installation is complete. It should be applied along all perimeter edges of the Wall Mural, especially in environments subject to humidity such as bathrooms, shower boxes, pools, laundries, and wellness centers in...

Crystallizer for wallpaper
Allows you to make the Wall Mural washable

Specific Glue for Fiberglass Wallpaper - 1200 gr
Our specific glue for Wall Murals in fiberglass is the ideal solution to ensure a flawless installation and exceptional durability of your covering. Formulated with advanced polymers, this adhesive is designed for the unique needs of fiberglass, offering a powerful grip and superior resistance...
- Choosing a selection results in a full page refresh.